|
Lego Biplane Jig
by Christopher Brown

HyperScale is proudly supported by Squadron
Like many others, I returned to the hobby in recent years after enjoying building and crashing many Airfix and Matchbox kits in childhood. I progressed through nostalgia builds, to multimedia kits, to limited run and have settled on thematic modeling.
One of the themes I have been working on is RAAF training aircraft, which inevitably lead to (gulp) the biplane challenge. I purchased the Pavla Tiger Moth in 1/72 scale which includes nicely detailed major components and resin parts, but is let down by struts and undercarriage that re poorly moulded, and weak attachment points between the upper and lower wings.
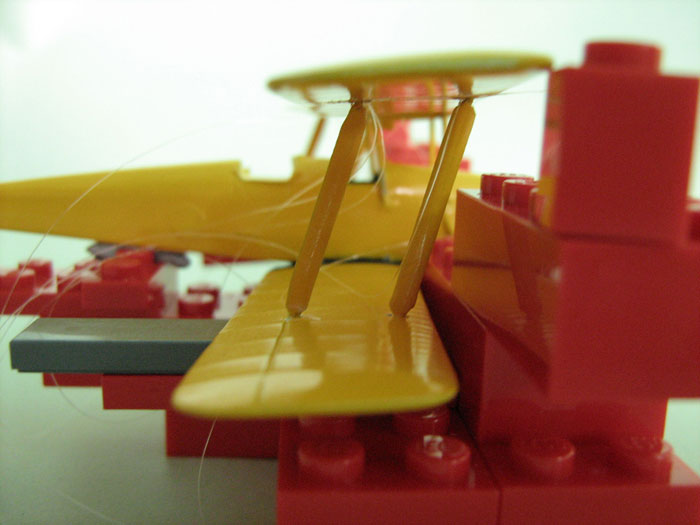
I solved the strut and strength issues by a mixture of improving the kit parts and substituting scratch built components, and by reinforcing the strut joins with fine gauge piano wire. Then I realized that this delicate assembly would need to be aligned and held while setting.
At first I considered building a card jig to set the stagger, but abandoned this when I realized it may not adequately support the assembly while the glue set. Next, I had a very close look at the Aeroclub etched brass jig, which looked fantastic but was expensive and out of stock at the time I needed it.
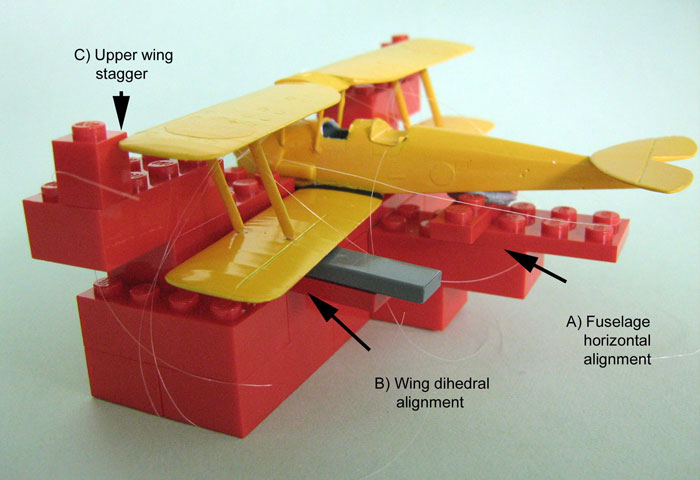
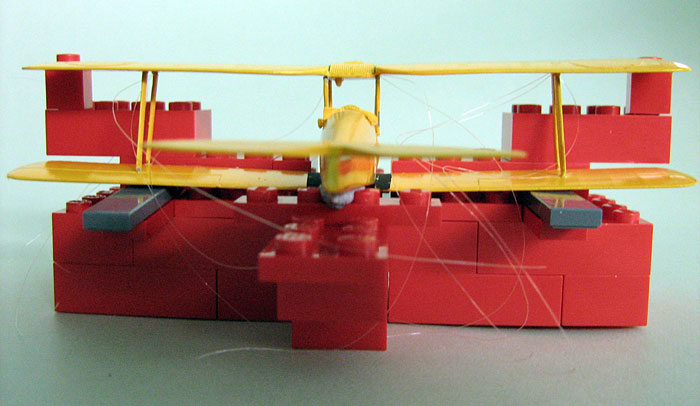
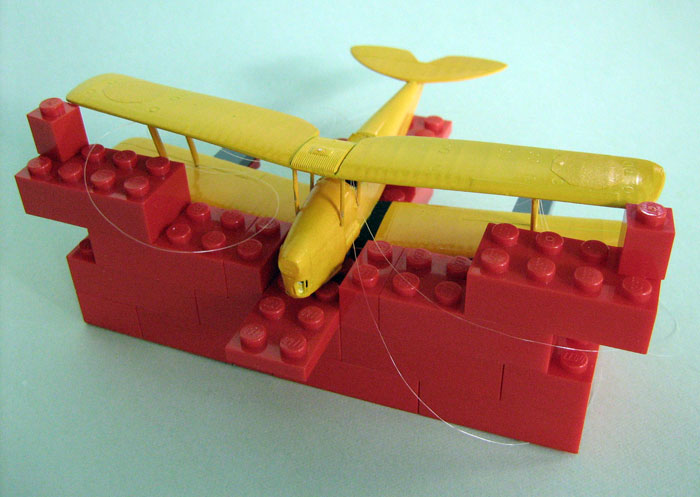
Finally, I found a simple, low cost solution which offered a number of unexpected benefits. Using some of the abundant Lego that seems to surround our son, I built a simple jig that allows the alignment of the upper and lower wings, and stagger and dihedral of the wings to be checked, while with judicious use of Blu Tack gives firm support when assembling the wings and glue sets.

The set up can be determined from accompanying images in which the cardinal adjustment points are highlighted. The fuselage is aligned first in the centre of the jig and held in place with Blu Tack. The lower wing must touch the gap in the blocks, which provides the reference right angle for all subsequent adjustments.
-
By moving the blocks at A toward or away from the tail, the centre line of the fuselage can be aligned horizontally. This aligns the model in ‘pitch’ and ‘yaw’.
-
By moving the blocks at B inward or outward, the lower wing dihedral can be set, and the model ‘roll’ aligned to be horizontal.
-
Finally, the stagger and alignment can be set by moving the block at C inward or outward, and by rotating it so it matches the leading edge sweep.
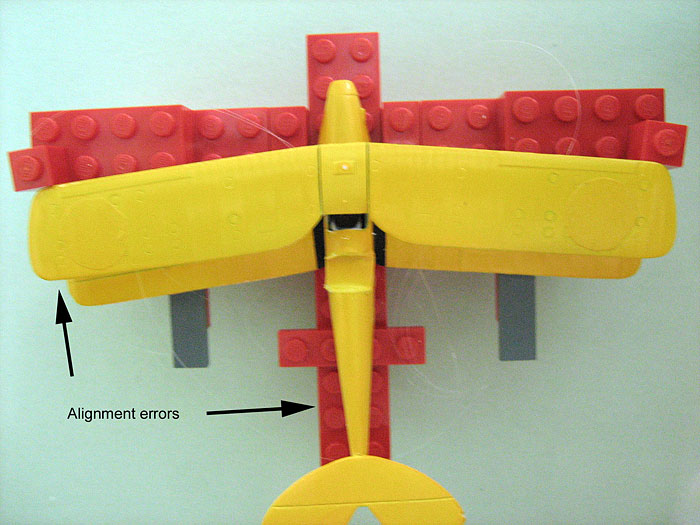
I was quite surprised at how simple it was to set the arrangements of blocks to give reasonably accurate angles. Aligning the jig on the grid on my cutting mat also highlighted how I had made some errors in aligning the lower wing in assembly. The upper wing is also slightly warped, which stands out when compared to the jig.
Total time to assemble – less than half and hour.
Total cost – zero, until my son comes to claim his Lego back!
Text & Images Copyright © 2008 by Christopher Brown
Page Created 22 October. 2008
Last Updated
22 October, 2008
Back to Reference Library |
 Home |
What's New |
Features |
Gallery |
Reviews |
Reference |
Forum |
Search
Home |
What's New |
Features |
Gallery |
Reviews |
Reference |
Forum |
Search