|
The Quest for an Air Compressor
by Glenn Irvine

HyperScale is proudly sponsored by Squadron.com
I built my first compressor from the guts of a home air
conditioner unit( I actually cut open the can and removed the compressor, this
was before I found out this was not necessary) but it had no pressure regulation
and was far too powerful for my Olympos Iwata HP-C. This was about 1976/7. As a
result I couldn’t get the best from my airbrush and always thought it was the
brush, as I couldn’t find anything wrong with the air supply. Because it was
constant and didn’t appear too excessive.( remember, I was only 16-17). I later
was to sell the brush when I discovered cars as I thought I couldn’t fix its
problems. I was able to successfully spray paint many models and paintings with
this set up, but the stoppages were too frustrating.
The
Importance of Regulation |
After re-discovering models and buying a S/H Badger 200, I needed another
compressor as I realised how important regulation of the air supply was. I
bought one of these and a friend had a diaphragm compressor that had seen better
days, which I also picked up cheap.
I was aware of the problems with pulsation with this type of
compressor so I sourced a S/H air tank from a truck wrecker and with a few
fittings, press regulator and some creative metalwork and paint I had a
serviceable compressor that served me well for 11 years. Its disadvantages were
its size and noise.
Building an
Airbrush Compressor |
Having moved into a smaller house much more restricted modelling space and a
family, I was relegated to airbrushing in the shed outside. This I found a bit
limiting, so I have always dreamed of a better compressor, I had an old article
on how to construct a compressor from a fridge unit, so I finally decided to do
so. I decided I needed a double action airbrush at about this time too, so I
treated myself to a new Iwata HP-B after I finished the compressor. (God, I’m
good to myself aren’t I?)
I found a few used fridge compressors (free, they were at a scrap metal yard)
and after testing, selected one that seemed ok. This involved checking
compressor operation and especially, pressure. Remember they are being thrown
away for a reason.
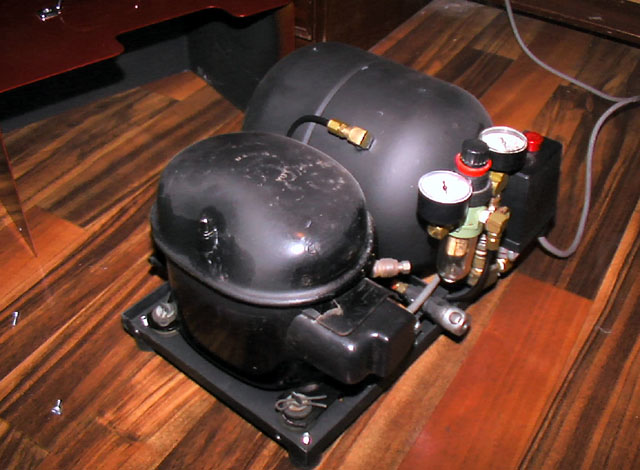
I then sourced a suitable reservoir; in my case it was a Primus gas bottle that
was flushed out with compressed air. The fitting was drilled out, being careful
not to damage the thread. The pressure relief valve was modified and adjusted to
blow off just over the cut off pressure of the pressure switch setting. A frame
was welded up from steel and the original compressor mounts from the fridge were
incorporated to simplify attachment. The tank had a couple of mounting tabs
braised to it and a hole drilled and a fitting braised to it to serve as the
input line.
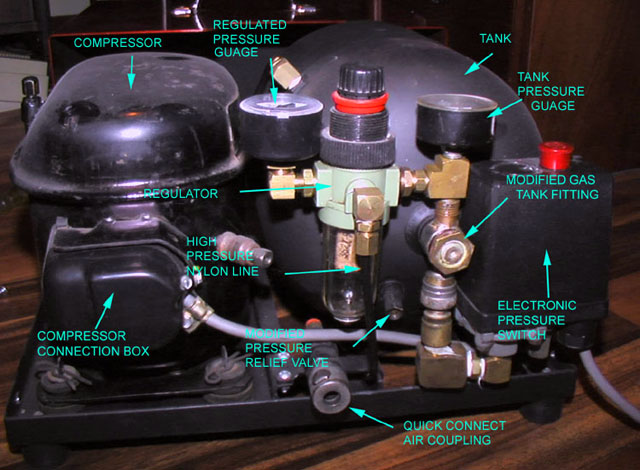
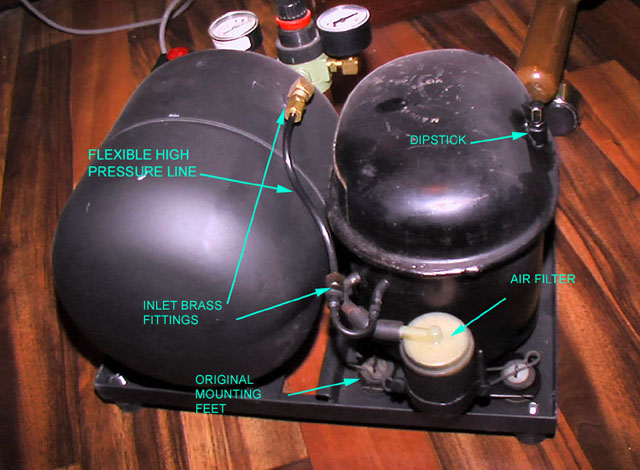
The compressor unit was modified to include a dipstick to check
and fill the oil and fittings silver soldered to the output line. An air filter
was coupled to the input line from a petrol filter and some rubber hose. The
unit and tank were coupled together using high pressure flexible plastic line
and brass fittings made up to adapt the gauges, press switch and outlet fitting
to the unit.
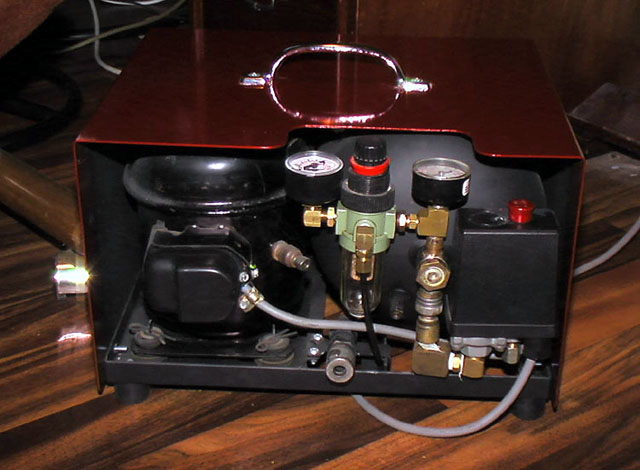
Finally rubber feet were fitted to the frame and a metal cover bent up and
welded at a sheet metal fabricator. This was then given a coat of Candy Apple
red (!) (left over from my car building days) and fitted with a handle. It
performs perfectly and is very quiet, so now I can airbrush inside at night
without waking everyone up.
I must point out that building this required quite a bit of
engineering and tools/equipment that most people may not have, also familiarity
with electronic circuits was also required. I would not recommend this to anyone
who is not familiar with the basics of an engineering workshop and circuitry, as
the end result may not be safe.
Also, be aware that because the compressor unit IS second hand,
there is a distinct possibility that it may have to be replaced at some stage,
so keep a couple of spare compressor units some where safe, just in case.
Cost was limited to a pressure switch, two gauges, a regulator
with filter, several brass fittings, some flexible high press line, 4 rubber
feet, some bolts and nuts, a quick release air coupling , a handle and the metal
case.
Text & Images Copyright © 2001 by
Glenn Irvine
Page Created 21 October, 2001
Last Updated
19 April, 2004
Back to Reference Library
|
 Home |
What's New |
Features |
Gallery |
Reviews |
Reference |
Forum |
Search
Home |
What's New |
Features |
Gallery |
Reviews |
Reference |
Forum |
Search