|
Digital Montage Photography
Part One
by Peter Allen

HyperScale is proudly supported by Squadron
I have seen and read many excellent articles on how to make digital
in-flight pictures but not having all the equipment I improvised with what
I had available.
Preparation
Not having anything else, I pushed the kitchen table up against a wall.
I secured a large sheet of stiff matt white paper with tape to the front
edge of the table and the wall behind so it swept up from the horizontal
to the vertical with enough flat area to place the model to be
photographed.
Lighting was pure daylight through the kitchen window.
(Note: it is best to commandeer the kitchen when the better half is not
cooking). Also if you have a shady spot outside were you could set up the
table so much the better. Clouudy days are best so the light is more
diffused than strong sunlight.
I shot each model with a with a Sony Cybershot 3.3 megapixel Digicam
borrowed from work. I took many pictures from which to make a final
selection.
Photoshop
Next step after downloading images on to the computer (mine is a Mac)
is to choose the best aircraft image and take it into Photoshop.
I cut out the aircraft from the background and retouched anything that
needed re-touching. I build models with undercarriage down so re-touching
was necessary for in-flight. Next I brought together the cut out plane and
a royalty free sky background and adjusted size and angle of the plane.
I also do not usually build models with pilots or crew so this needed
some airbrush work in Photoshop too. Once I was happy with the aircraft
position/angle/size etc and the background I then added jet exhaust. It is
important to save often as a glitch in the computer can loose a lot
of work.
Once everything is done I saved both as a Photoshop file and as a jpg
file.
Plane by plane
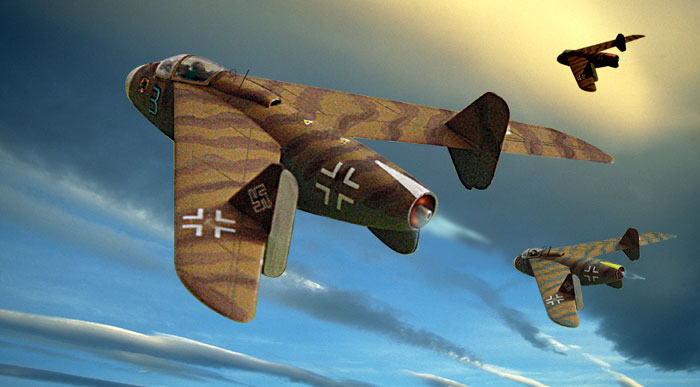
Huma 1/72nd Junkers EF128. (Title Image)
Once I had cut out the image and pasted it on to the sky background I
copied the plane layer twice and reduced them and adjusted the angles
and colours and retouched numbers.
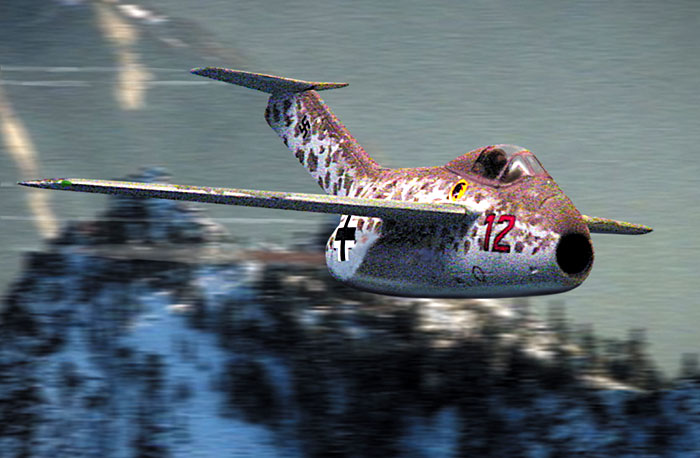
PM 1/72nd Fw Ta183 (Image Above)
With this one I wanted to try and give the impression of speed so I
added some Motion blur to the background in from photoshop filter files
.
Planet 1/72nd Messerschmitt Me P1110/1 (Image below)
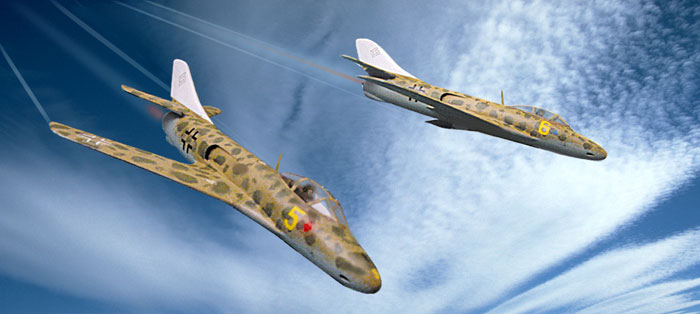
Similar process to the Ju EF128. The main image layer was copied and
the angle and size adjusted.
Good Luck!
Images and Description Copyright © 2003
by Peter Allen
Page Created 19 December, 2003
Last Updated
19 April, 2004
Back to
Reference Library
|
 Home |
What's New |
Features |
Gallery |
Reviews |
Reference |
Forum |
Search
Home |
What's New |
Features |
Gallery |
Reviews |
Reference |
Forum |
Search