|
A Rough Guide to Digital Montage Photography
Part Two
by Peter Allen

HyperScale is proudly supported by Squadron
After my first attempt at producing an article on Digital Montage
Photography I thought it might be a good idea to expand on this and to try
and do a step by step explanation.
Although I'm very happy with my models, they would not stand comparison
to most of the super mega detailed examples found on HyperScale. Doing
digital montages adds an extra dimension to modelling and the model to be
used does not need to be fantastic.
This starts immediately after shooting the model intended for montage:

PICTURE 1
This is the picture of the model to be used for the montage.
The Fw P1 model is balanced, in this case on an eraer, to portray
an angle that would not be possible shooting the aircraft simply stood on
its wheels.
PICTURE 2
Take the shot into Photoshop on computer, adjust brightness/contrast to
suit. Then using the pen tool create a path around the entire aircraft,
omitting the parts that would not be seen in normal flight such as the
main undercarriage.
PICTURE 3
Once path is complete save it naming it Rpath 1S, then click on Rmake
selectionS and it will be highlighted by a pulsing line.
Next press RcommandS RjS to delete everything outside Rpath 1S.
Then go to layers and click on the eye icon at the side of layer titled
RbackgroundS.
This will leave the cut out plane on a transparent background.
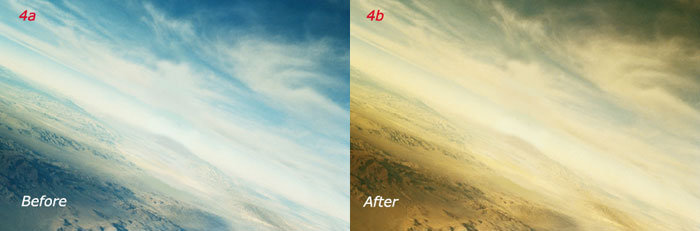
PICTURES 4 a and b
The next step is to find a suitable Royalty FreeS background.
If you wish you can adjust the colours by going to RImageS, RAdjustS
and then RVariationsS. This will open a screen with many colour variants
and the original. Simply adjust the colours to your liking. If you go too
far just click on Roriginal Rand start again.
In this case I adjusted the colour to take on a tonal value that
complemented the aircraft.
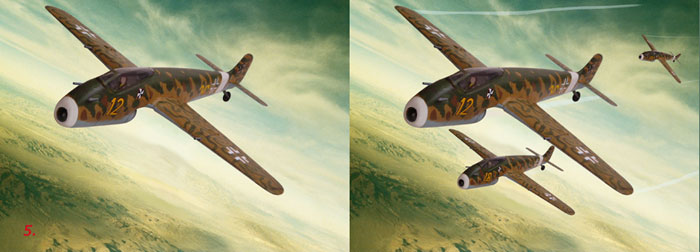
PICTURE 5
Now you have a master aircraft and the adjusted background. Open both
in Photoshop and drag the aircraft image on to the background. Adjust
angle and size etc.
At this point I would mention adding the pilot. Here, just for fun, I
happened to have a picture of myself in a position similar to that of a
pilot. I airbrushed in a helmet and jacket. I blurred and darkened the
finished assembly as it wouldn't be seen too clearly (what a relief).
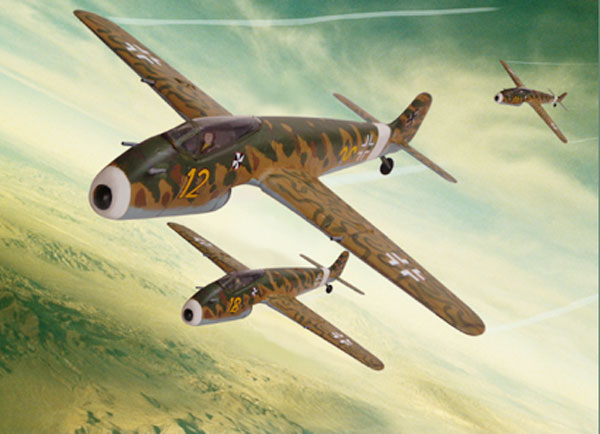
PICTURE 6
After the first aircraft was completed I copied the layer for each
additional aircraft and adjusted angle, position and size over the
background layer.
Then I retouched the camouflage, numbers and pilots to make it look
like 3 different aircraft flying as a group.
Last I added contrails and jet exhaust by drawing paths and blowing in
colour with the airbrush.
Images and Description Copyright © 2004
by Peter Allen
Page Created 25 January, 2004
Last Updated
19 April, 2004
Back to
Reference Library
|
 Home |
What's New |
Features |
Gallery |
Reviews |
Reference |
Forum |
Search
Home |
What's New |
Features |
Gallery |
Reviews |
Reference |
Forum |
Search