![]()
Building
Dioramas
Part One:
Airfield Projects
By
Helmut Latoschinski
|
Introduction |
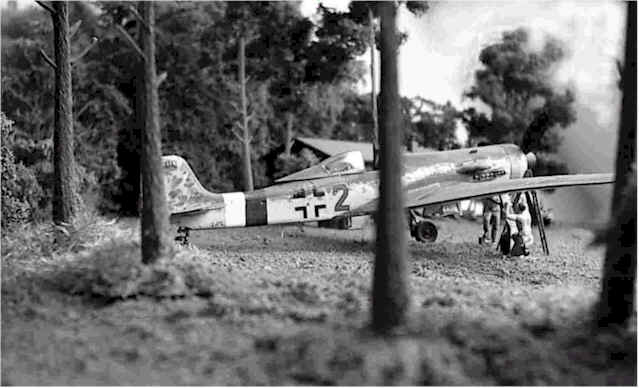
Is this a real wartime photo? It seems so - but it isn't. Okay, many folks may notice the missing swastikas on the aircraft's tail. But that shouldn't be seen as hard evidence, since there are many photos retouched to remove swastikas.
You can get such results if you take snapshots of your models in a realistic diorama setting. In this article I will try to give you some ideas and helpful hints for doing this kind of work.
For basics about photographing models you can take a look at Brett's articles in the reviews section here on HyperScale.
Some Basics |
This step is related to photographic techniques. If you take shots with a horizontal angle to the subject, you will see some of the background. What you need is "depth of image" instead of a flat background; a little sketch will explain the considerations about creating the background:
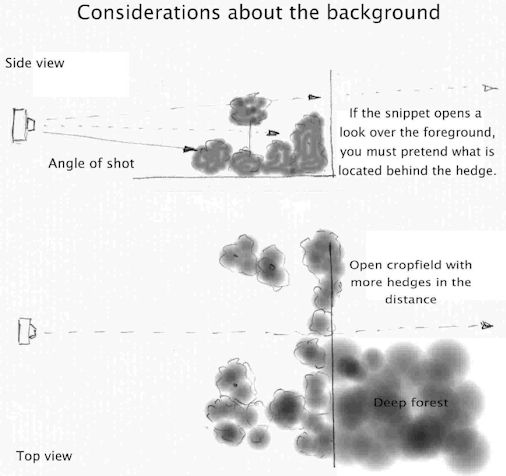
It is often possible to buy something that fits - or appears to fit - into scale. The model-railroad industry offers a lot of background art and pieces. If you want something special, you will have to work it out yourself. Many modellers are familiar with airbrushing, and it will be a challenge to work on something other than aircraft or armor. I looked for something fitting, but found nothing. So I did it myself, but with pastel chalks.
There is only one main rule for painting landscape: depict with full colour what is in or near the foreground, and fade out the colors with the distance. You may take a look at some artwork-books for information on background depiction.
Getting Started |
The first thing to do is to decide what subject matter you will represent. There are several topics worth building, some easy but maybe expensive, some more complex. In part I we will try the easy way. We will build part of a typical wartime airfield in northern Germany. There are a lot of well known places in this area: Varrelbusch, Nordhorn or Hustedt for example in the northwest-area.
To depict the runway was too simple for me. It is well known that the aircraft were parked sometimes kilometers away from the runway. My theme will be such a parking area near the forest.
Some original shots:
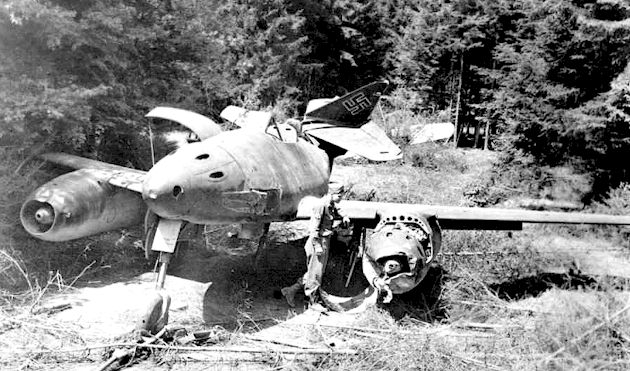
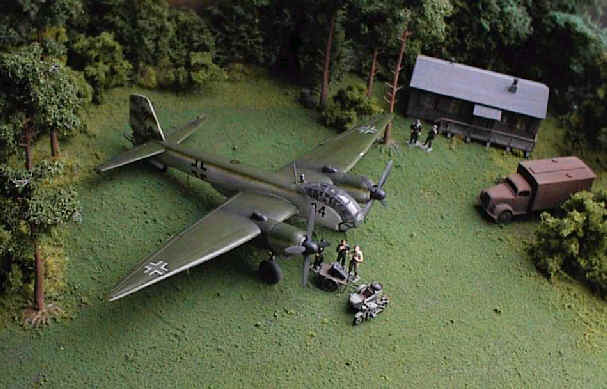
An Me 262A-1a abandoned in a forest in 1945 (photo courtesy Charlie Swank). Notice that there is no sharp dividing line between forest and open country. This zone of lower trees, hedges and bushes is typical for northern Germany.
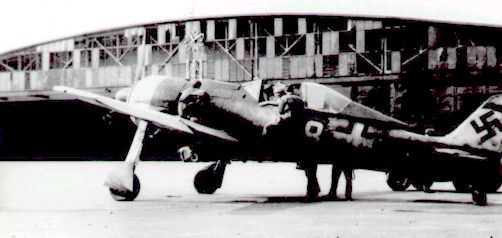
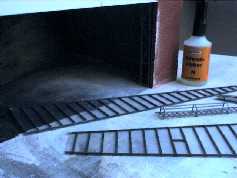
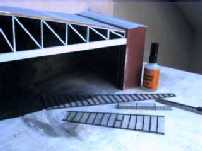
You may want to depict a representative building, like this hangar, and inquisitive servicemen (photo courtesy Charlie Swank):
After getting ideas, it is useful to make a little sketch:
Now it's time to go shopping. If you do 1/72, it can be easy. As long as yout put material from 1/87 model railroad to the background, it is useful. It will be more complex in 1/48.
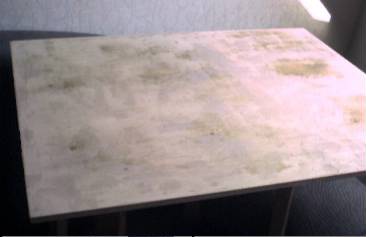
The foundation (55 x 45 cm) is 9 mm plywood, the background (55 x 18 cm) is 6 mm plywood. I bought several ready-to-use trees from "Heki" (I don't know if it's available outside Germany) and an interesting set for building bushes from a material with very fine branches, maybe useable in 1/48 too. Grass and leaves were from Woodland (U.S. stuff, everywhere available), mats for higher grass from Heki again. I found a nice barracks in the assortment of Faller. The vehicles and figures are from Hasegawa, Esci/Ertl and Italeri 1/72, additional from Fujimi 1/76 and Preiser 1/87 - sometimes you have to "lie" a little bit.
 I began my
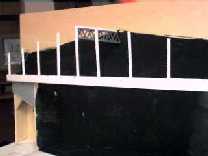
work with the background: deep wood on the right half, open country on the left.
I began my
work with the background: deep wood on the right half, open country on the left.
The horizon line on the left side was found as too high during the tests and was corrected after taking this shot.
Main Construction |
 As you will
know, after all the planning, in the construction phase you will find
differences ("Murphy's Law").
As you will
know, after all the planning, in the construction phase you will find
differences ("Murphy's Law").
To minimize the differences, I tested the scenery. At that point I found out that the horizon line of the background was too high.
I had to be sure that even twin-engined aircrafts like Junkers 188 or Heinkel 219 fits between the trees.
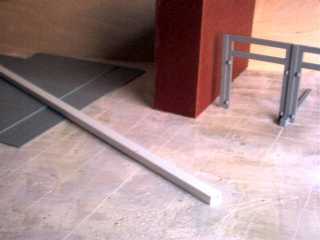
One important hint before you take the glue to apply the trees: Do not place everything directly on the foundation. Landscape is not absolutely horizontal in reality, a totally flat scene may even look monotonous. So I applied some stacks of cardboard between 2,5 and 7,5 mm (3 layers) on the ground plate.
On the image, you can see that the area around the shack is elevated with one layer (2,5 mm).
 The trees
were also altered. I sprayed the trunks with the correct colour, the pines are
light red-brown, not dark-brown as delivered.
The trees
were also altered. I sprayed the trunks with the correct colour, the pines are
light red-brown, not dark-brown as delivered.
To putty the landscape, I use cellulose-powder (base for wallpaper) with white-glue and black/brown full colour (also from the wallpaper-store).
The result is a smooth consistency, easy to work with.
Cellulose-based putty is less fragile then plaster-based putty, and it's friendly to all types of glues for the followings works. The only problem is that it takes a while to dry (about one day).
 During the
next step, the trees were hot glued to the ground.
During the
next step, the trees were hot glued to the ground.
Then the grass was applied in stripes using spray-glue.
After that, some fragments of high-grass mats were fixed under the trees with white-glue - it would melt on hot-glue.
Excess grass-powder can be removed by a vacuum-cleaner.
Here you can see the finished scene from the left side:
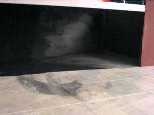
This diorama opens severeal views to the depicted aircraft - frontal, from half-left or half-right or right through the trees or bushes.
The Results |
Here are some pics using the diorama to present models after I had changed the digital camera. I'm sorry about the low quality of the other pics.
The subject of this photograph is an Aoshima Ta152:
This is an interesting point of view, through the trees on the left side.
This is the same picture that was converted to black and white and edited to use for the introduction.
The other samples are based on my newest model project: The Junkers 388 L Recconaissance aircraft.
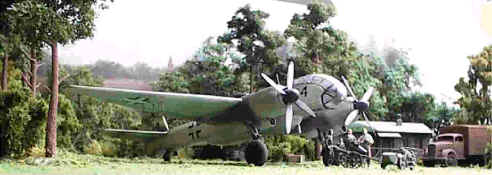
Conclusion |
As you can see, it is a question of having the "right idea" to create such a simple diorama. If you are able to build and paint an aircraft or armor subject, maybe even modify or superdetail it, you WILL BE ABLE to build a diorama as it is described above. Watch out, it is more expensive than you might expect. The costs for this project (without aircraft and vehicles) were about 200 DM (maybe about 100 US$). High-quality trees and other model-railroad accessoires are expensive! But it's worth trying. You can display your models in a more realistic environment than a simple rack. A last warning: Do not plan it too small. I wasted one set of ground plates (40 x 30 cm) and found that it was not deep enough to take horizontal shots. The image "does not work" if it's too small.
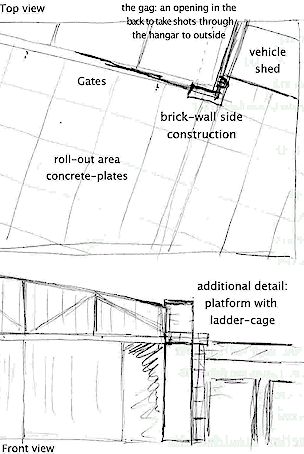
Looking ahead to part II: This will be more complex stuff - a scratch-built hangar scene!
Text and images by Helmut Latoschinski English brushed up by Russ M. Field
Back to HyperScale Main Page
Back to Reference Library