|
Building Dioramas Part 7
Water Surface Featuring Blohm & Voss
BV 138
by Helmut
Latoschinski

HyperScale is proudly supported by Squadron
During the summer of 2001 I fell in love
with the Blohm & Voss BV 138 flying boat. A friend of mine had the Supermodel
(Italy) kit in his basement for years. He decided to switch to building 1/48
exclusively, so he offered me this nice kit.
The BV 138 was introduced in limited
numbers in 1941. After some modifications the main series (over 200 aircraft)
was widely used by the coastal patrol and long range sea recconnaisance units
across Europe, mostly from Norwegian and French bases. Because of its Jumo 205
diesel engines, the BV 138 was an economic aircraft and could even be refuelled
by U-boats, a common practice during their North Atlantic patrols.
The diesel caused heavy exhaust stains.
There is a fine Swedish website dedicated
to the "Flying clog", the unofficial name of this aircraft (see "References").
The text at this site is in English and there are alot of nice pics.
Building the
Supermodel Bv 138 |
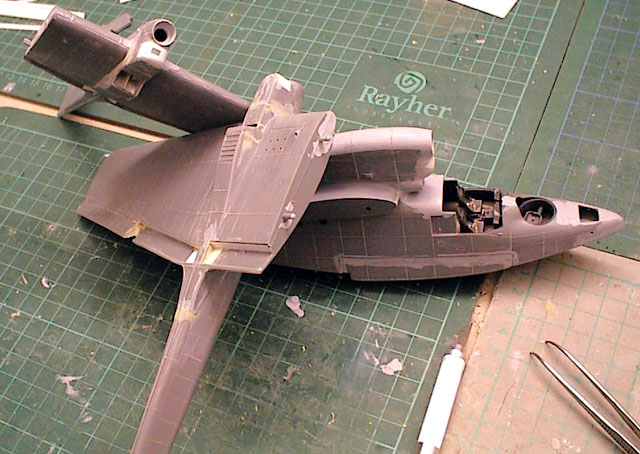
Although an old kit, it is quite accurate.
I sanded the raised panel lines down and rescribed them. Fortunately, I had a
Falcon canopy replacement set. Some areas were highly modified:
-
The cockpit was
scratch-build using some additional PE parts and resin seats
-
The front of the
engine nacelles were rebuilt to depict the recessed black oil cooler
-
The weapon turrets
were rebuilt using Aires Gun sets
-
Ailerons were
repositioned
-
Flaps were cut out
-
Ship detection
radar "FuG 200" added (modified from Kora PE set)
-
Front hatch was
cut out
-
Modified figures
by Preiser and CMK
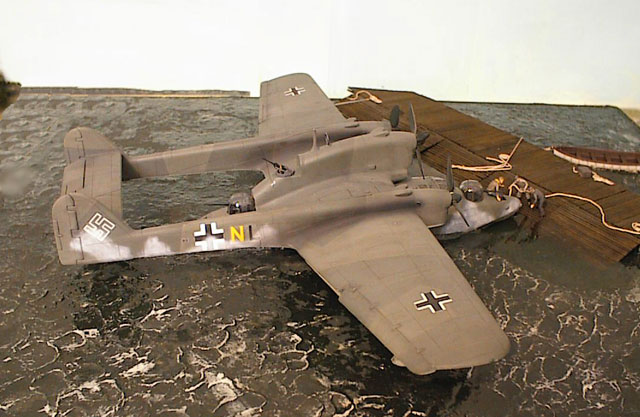
After checking all references, I decided to
paint the kit in the "iceberg" scheme used by Seeaufklärungsgruppe 130 in 1944.
The base camouflage is the common "splinter" scheme using RLM 72 and 73 (grayish
variants of RLM 70/71 for maritime use). I mixed these colors using Tamiya
acrylics. The whitewash was applied using "Schmincke Aero Color", a new special
high-pigmented color for artists. One drop of this color diluted in 1ml of 70%
alcohol allows application of near-transparent layers.
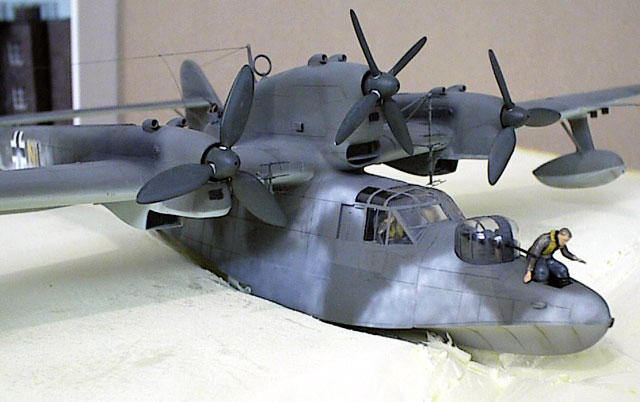
After adding final details like radio wires
and applying a mix of decals (Aeromaster, Eagle Strike and PD-Decals) the kit
was weathered with mists of Schmincke Aero Color and artist oils (again
"Schmincke") and sealed with 7:1 mix of floor-wax and Tamiya flat-base.
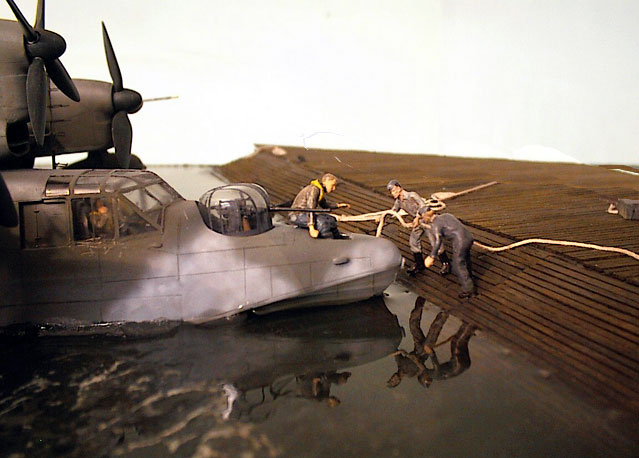
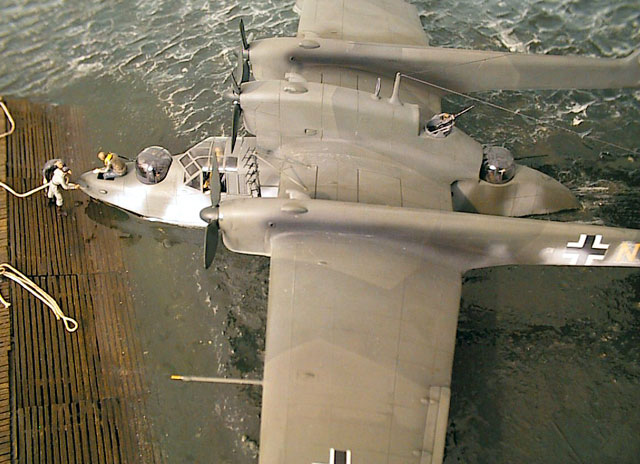
This model benefits from being displayed in
a natural setting. A photograph with the aircraft at a landing stage was the
inspiration for my diorama. These stages consisted of a horizontal gangway
attached to a stage directed into the water at about 15 degrees.
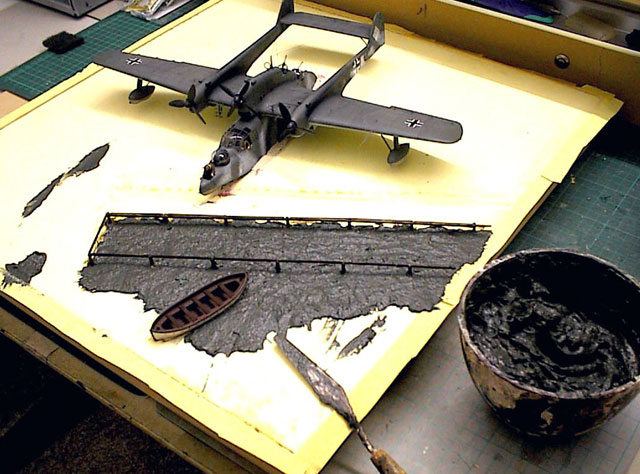
I began with a piece of 50 x 50 cm
"Styrodur" hard foam plate and set the landing stage at an appropriate angle
that would make it as visible as possible. To create the angle I cut out a
V-shaped channel that would later be filled up with clear epoxy. The aircraft
was arranged and the foam cut to fit the hull at the waterline. A small boat
was added to give life to the scene.
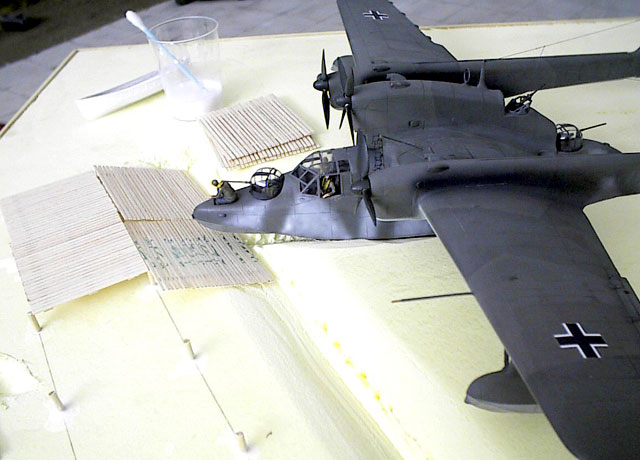
To build the landing stage, I cut 0.8 mm
Balsa wood into small strips and glued the diving sections (5x6 cm) and the
gangway (5x5 cm). Both were painted by highly diluted artist oils.
I drove wooden meat spikes into the foam to
prepare a support beam.
Now it was time to attach the model and the
boat to a "water" base. I used modelling clay for this purpose. But how could
I depict the "moving" water surface? First I thought about some kind of
plaster-free clay. I have fiddled around with this stuff in the past, but it
tends to crack when applied in layers thicker than 3 mm.
 A friend suggested I try "Papier Machê", a
kind of paper powder that gives a smooth, slow drying, consistency after adding
water. This stuff was originally made for molding "Punch & Judy" puppets. (In
North America, "Celluclay" can be used.) To avoid errors on the actual diorama,
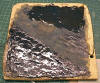
I made a test area with a layer of 3 - 4 mm. I tested three types of tools to
mold small waves. The template took four days to harden
(click thumbnail to left to view larger image). A friend suggested I try "Papier Machê", a
kind of paper powder that gives a smooth, slow drying, consistency after adding
water. This stuff was originally made for molding "Punch & Judy" puppets. (In
North America, "Celluclay" can be used.) To avoid errors on the actual diorama,
I made a test area with a layer of 3 - 4 mm. I tested three types of tools to
mold small waves. The template took four days to harden
(click thumbnail to left to view larger image).
Although I added color to the papier machê
mixture to get a dark sea green, it dried as a pale gray-green. However, after
applying 20-minute-Epoxy it turned back to the color it had before.
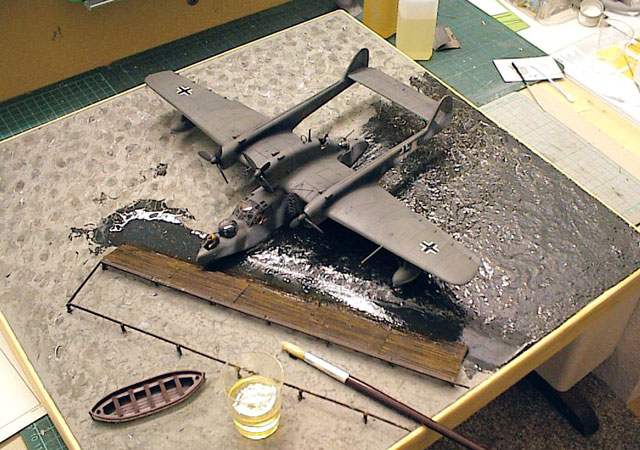
Now I had enough experience to try it on
the original. I carefully applied a thin layer of pre-colored Papier Machê
(Tamiya Field Blue and Deep Green) with a long artist spatula.
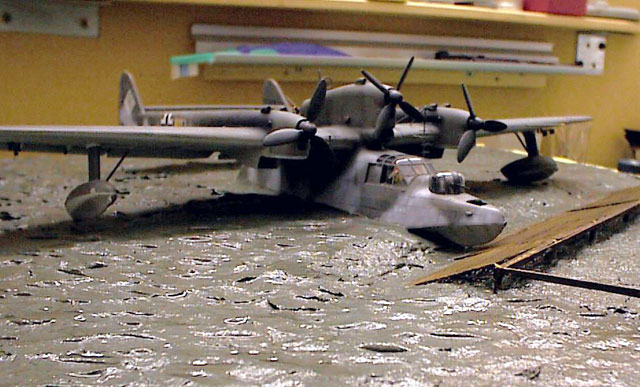
I then molded small waves with another type
of spatula left from the landing stage and the model, with almost no water
movement shown on the lee side. The spatula had to be wet to mold out the waves.
Now it was time to sink the sloping stage into the "water". It took around four
days to dry completely.
To get more variation in color, I toned
down the lower areas of the waves slightly with a bluish green and highlighted
the tips with diluted white.
Click
the thumbnails below to view larger images:
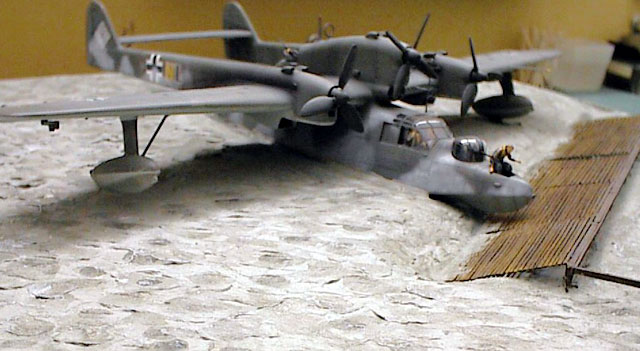
The next step was applying the 20-minute
clear epoxy. First, a thin layer was applied over the entire base, and then I
filled up the V-shaped channel. Everything dried over night.
Finally, I completed the gangway and added
details like ropes (from model ship equipment) and figures.
The result turned out just the way I had
hoped. To me, the key for this result was the test-area where I could figure out
the best methods for the real thing. All in all, this was a "quickie" for me.
The complete project was finished in three weeks.
If you ever try do model something with
water, I highly recommend "Papier-Machê/Celluclay" and 20-Minute-Epoxy. It
works!
Thanks to Ian Robertson for the
corrections!
Click
the thumbnails below to view larger images:
Text & Images Copyright ©
2001 by Helmut Latoschinski
Page Created 30 December, 2001
Last Updated
19 April, 2004
Back to Reference Library
|
 Home |
What's New |
Features |
Gallery |
Reviews |
Reference |
Forum |
Search
Home |
What's New |
Features |
Gallery |
Reviews |
Reference |
Forum |
Search