|
Fixing the Fangs
Improving the Intakes of
Classic Airframes' 1/48 scale Vampire FB.5
by Brett Green

Classic
Airframes' 1/48 scale Vampire FB Mk. 5 may be ordered online from Squadron
Sometimes, plans just do not convey the look of a three
dimensional object.
Classis Airframes' new 1/48 scale Vampire is a very attractive
and well detailed kit of this important early jet fighter. The
overall shape of the model is excellent - vastly superior to the
horribly misshapen Hobbycraft Vampires of the early 1990s.
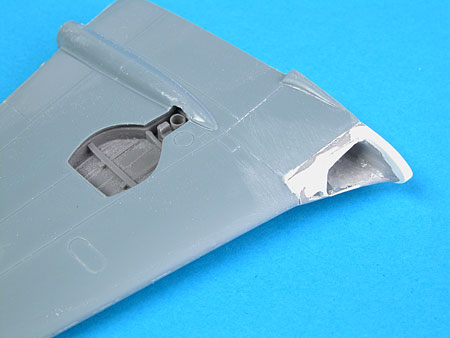
The only real issue with this kit is the shape of the intakes.
When the resin parts in isolation are compared with plans in the
Warpaint book on the Vampire, the shapes appear to be okay. However,
when the part is fitted to the model and compared to photographs,
something is not right.
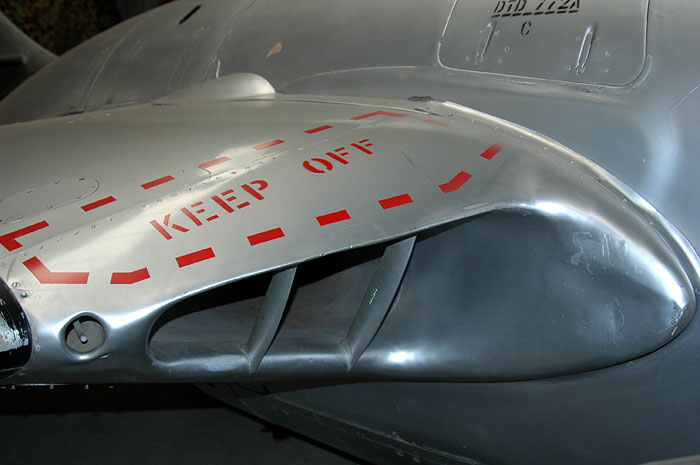
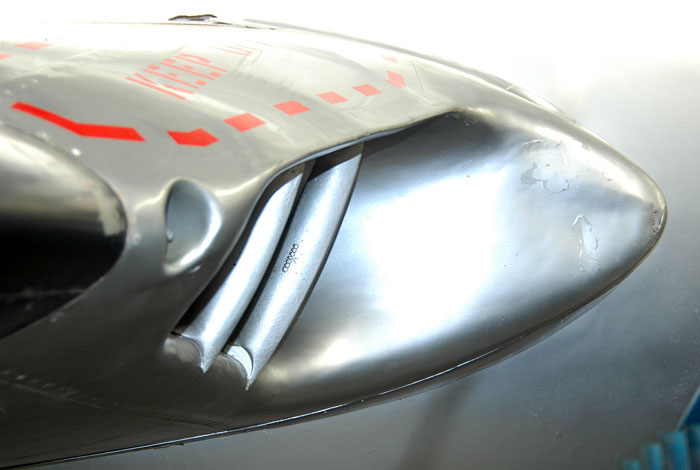
Vampire intakes are a particularly tricky shape. I decided to
visit a local aviation museum to take some photographs of the
intakes on a Vampire T.11 from several angles.
Please note on the FB.5 the small intake on the port side is also
round, not the wider shape of the T.11.
Click the thumbnails below
to view larger images:
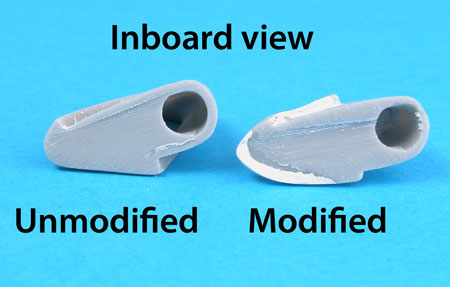
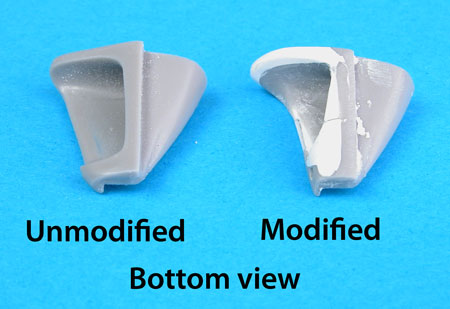
The unique shape of the intakes was not entirely captured by the
plans, nor by the Classic Airframes resin kit parts. The good news,
though, was that the resin parts could be significantly improved
with a few modifications.
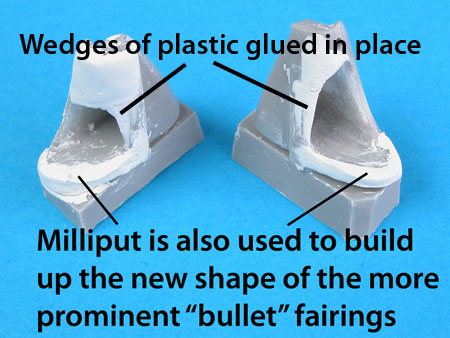
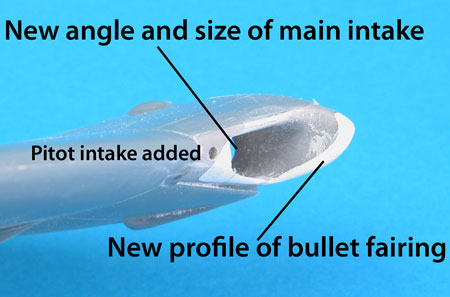
The tasks required to improve the shape of the intakes can be
summarised as follows:
-
flatten the leading edge of the
resin intake parts
-
fill the outboard area of the
main intakes and extend the leading edge of the bottom intake
lip (forward)
-
reshape the main intake
-
add small secondary intakes
-
extend the "bullet fairing"
forward and reshape its profile.
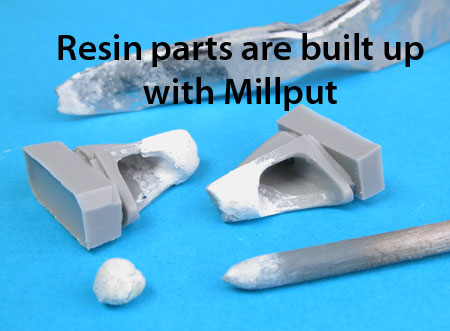
Tools and Putty
The tools employed were:
-
Milliput, a fine grain two-part
epoxy putty, was used for the filling and building up of the
parts.
-
a wooden rod and a staple remover
to help apply and shape the wet putty
-
a Dremel Motor Tool fitted with
several different shaped dental burrs for grinding and shaping
when the putty was dry, and
-
sanding sticks for fine tuning
and smoothing.
Step by Step
Classic Airframes' 1/48 scale Vampire FB.5 builds up
into a very attractive replica, as we have already seen in
Kevin
Martin's Construction Feature. Even straight from the box,
Classic Airframes' offering is a vast improvement over the old
Hobbycraft kits.
However, if you want to address the shape of the
intakes and the bullet fairings, you can do so fairly easily based
on the reference photos in this article using some epoxy putty, a
motor tool and some sanding sticks, .
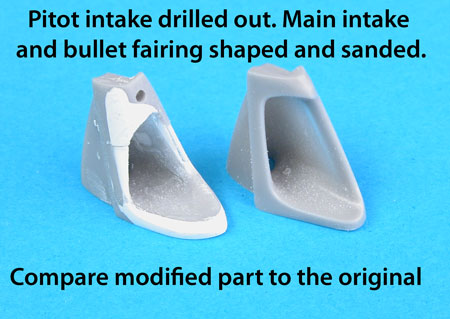
I am not sure that I entirely captured the look
of the intakes myself, but I believe that it is an improvement. With
the benefit of hindsight, I should probably have used a strip of
rectangular plastic, not a wedge shape, to extend the leading edge
of the bottom intake lip.
Even so, I found this little project to be enjoyable
and worthwhile.
Now all I have to do is build the rest of the kit!
Model,
Images and Article Copyright © 2005 by
Brett Green
Page
Created 15 February, 2005
Last updated
22 February 2005
Back to HyperScale Main
Page
Back to Features
Page
|  Home |
What's New |
Features |
Gallery |
Reviews |
Reference |
Forum |
Search
Home |
What's New |
Features |
Gallery |
Reviews |
Reference |
Forum |
Search