Home |
What's New |
Features |
Gallery |
Reviews |
Reference |
Forum |
Search
Home |
What's New |
Features |
Gallery |
Reviews |
Reference |
Forum |
Search
|
|
|
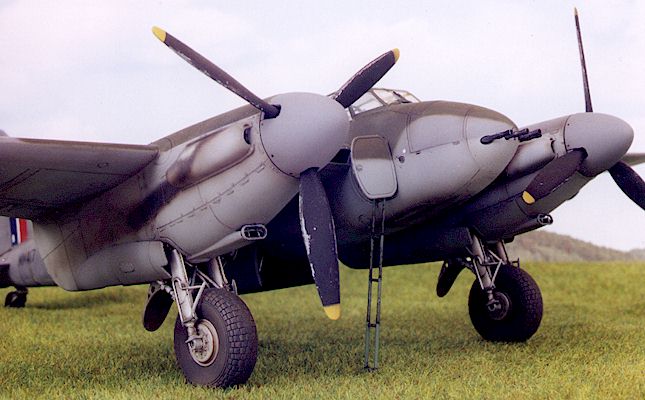
DeHavilland Mosquito FB VI Model by Chris Wauchop
Contents Chris Wauchop's Mosquito in 1/48 Scale
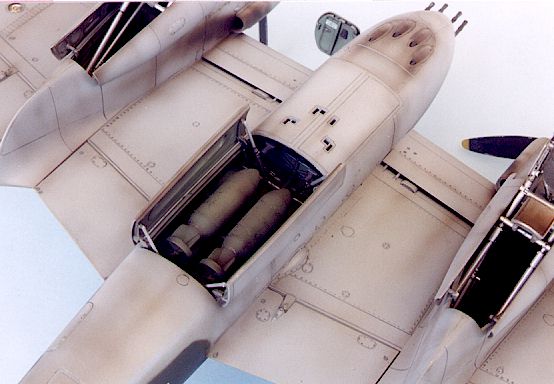
Here is Tamiya's new Mosquito in 1/48 scale built by Chris Wauchop. The kit went together effortlessly. Detail is so good that very little extra work is
required to produce a museum-standard model. The only additions and modifications made by
Chris are listed below:
Paints used were actually modern RAF colours in the Gunze range - Gunze 330 BS381C/641 Dark Green, H75 Dark Sea Grey and H335 BS381C/640 Medium Sea Grey lightened with about 30% white. Chris felt that these colours captured the feel of the three-coloured scheme better than the recommended paints. The aircraft interior was painted H319 JASDF Light Green toned down with medium grey. Chris did not use the interior framing decal, as the colour looked a bit lurid. He masked and sprayed instead. The bombs were painted Tamiya XF-51 Olive Drab and then weathered with a black-brown exhaust coloured stain. They were finished off with "scratches" from a 2B lead pencil.
Decals gave no trouble using Gunze Mr Mark Softener. The fin flash was a little tall so Chris shortened it by 2mm. A white mark is in evidence on the fin flash in a number of photos. Chris does not think this is a souvenir of a passing bird, as it is symmetrical in shape and appears on other Mosquitoes. This mark was hand-painted after decals were applied.
Click on the thumbnails below to view the full-sized image. Click on your browser's "Back" arrow to return to this page.
7 photographs are categorised, captioned and thumbnailed below. To view an image at its full size, click on the thumbnail. To return to this page, click the "back" arrow on your browser.
Model by Chris Wauchop
|