Home |
What's New |
Features |
Gallery |
Reviews |
Reference |
Forum |
Search
Home |
What's New |
Features |
Gallery |
Reviews |
Reference |
Forum |
Search
|
|
|
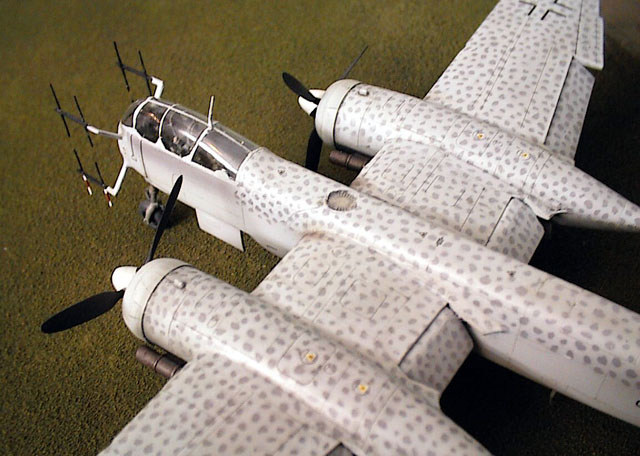
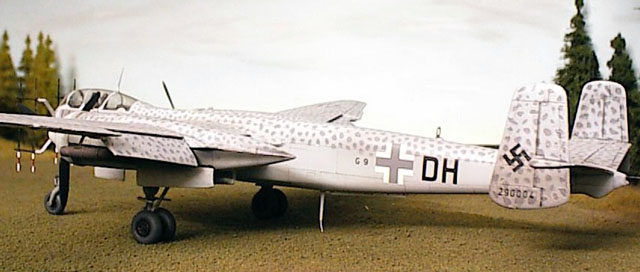
Reverse Mottling Technique demonstrated on a 1/72 Heinkel He 219 By Helmut Latoschinski
Many modellers fear applying mottled camouflage schemes, especially if the dots have hard edges. A typical aircraft showing this scheme is the Heinkel He.219; you will find examples here on HyperScale at www.hyperscale.com/gallery/he219cw_1.htm According to a number of sources, the scheme was accomplished by applying a solid layer of RLM 75 on the top of the entire aircraft, followed by RLM 76 sprayed in a random squiggle pattern, thereby leaving small spots of RLM 75. Understandably, most modellers opt to apply dots of RLM 75 over a base of RLM 76 rather than "reverse mottling".
I have attempted several mottled schemes before, including on a 1/72 DML Heinkel 219. However, the result lacked the irregular, hard edged dots I wanted to simulate. Osvaldo Viggiani's stunning nightfighter collection posted here on HyperScale, and my change to a new airbrush, prompted me to try reverse mottling on my He.219. His Ju 88 G1 at http://www.hyperscale.com/gallery/ju88g1gov_1.htm, which was the cause of much excitement among HyperScale viewers, appears to have been painted using some kind of template rather than reverse mottling. My goal was to produce a similarly beautiful result by reverse mottling.
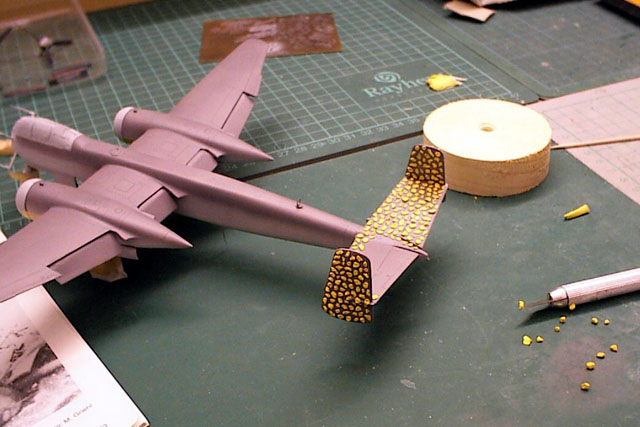
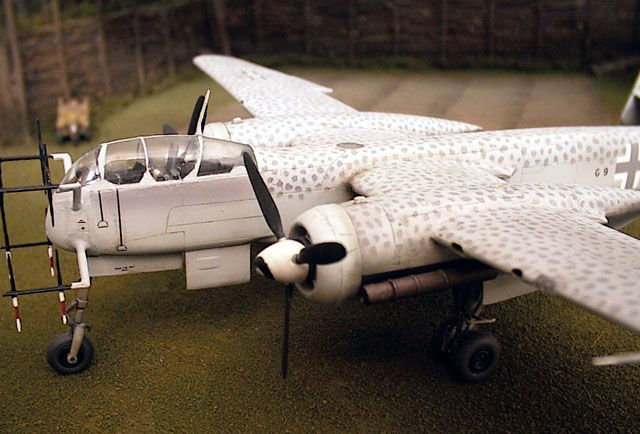
To check out what was possible, I conducted painting tests on pieces of plastic card. Although I could get lines that were fine and consistent enough to do a mottled scheme, I feared that it would be near impossible to control overspray AND concentrate on creating the irregular scheme. So, I tried something different. I took some UHU-Tac, a yellow, easy removable low-tack adhesive that is designed to hold posters on wallpaper without leaving stains (also known as BLU-Tac), cut it into very little pieces, and then pressed them on the surface of my model. It's soft consistency allowed me to work out different shapes. Spraying the test sheet produced a mottled effect that I was pleased with.
After checking all my references, I decided to build my "Uhu" as the A2-Variant, radio-code G9 + DH of I.NJG 1 (Werk-Nummer 290004). It was shot up during an Allied air raid at Münster-Handorf on February 2nd, 1945. The wreck remained there until the end of the war. The Dragon kit was modified as follows:
For the repaint, I had to prepare the model:
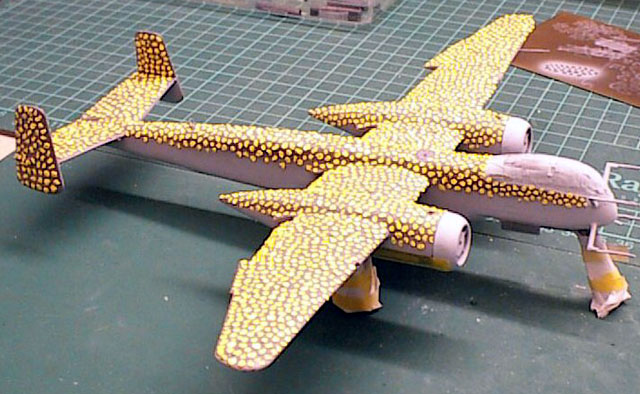
Now for the hard part! I knew that masking with UHU Tac would be a test of my patience. As expected, masking the model with 0,5 to 1,0 mm diameter dots, and keeping my mind on producing an irregular pattern, took many hours. But after all was done, I knew success was close.
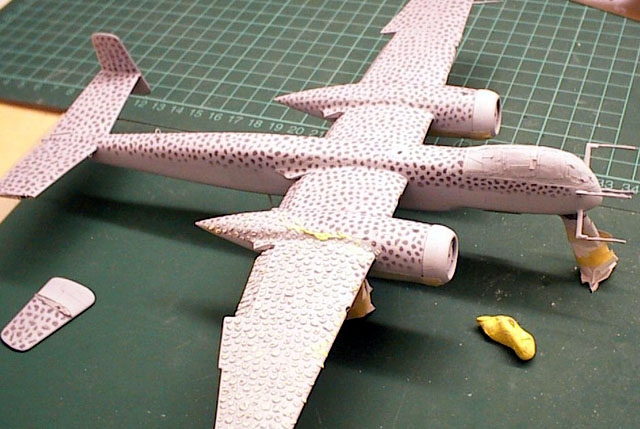
The final RLM 76 coat was sprayed in several light layers. I then rubbed off the masking dots and found nice, hard-edged mottles - exactly what I wanted to get.
To tone down the contrast, another light coat of RLM 76 was sprayed over the model. After sealing the model with floor wax, new decals were applied (Aeromaster mix & selfmade).
Weathering was done with artist oil washes and airbrushed exhaust & cordite stains. The final dullcoat was floor wax mixed with Tamiya Flat base (Thanks to Anthony Manzoli).
This time I was pleased with the result - the time-expensive masking had paid off. Examine the results and enjoy the pics. I've now lost my fear of reverse mottling; it's just a matter of patience, since cost of UHU-Tac is trivial.
I would like to thank Ian Robertson who did the corrections!
Text, Models and Images Copyright © 2000 by Helmut
Latoschinski
|