|
Post-Shading Panel Lines
by Jamie Haggo

HyperScale is proudly sponsored by
Squadron.com
In my view, a model painted with a solid flat colour maybe accurate but
simply does not look representative of the real thing. Therefore various
painting and weathering techniques have developed to fool the eye in to thinking
the object is 3-dimensional.
Most modellers will apply a wash of a dark tone into recessed panel lines to
give the illusion of depth. Sometimes however, this can look too harsh if the
wash is too strong a colour leaving the model looking like a diagram.
Another technique is pre-shading. This is where a dark colour is sprayed
along panel lines over a contrasting base primer, and then the camouflage colour
is applied over the top in thin coats. The effect is built up slowly until
eventually there is only a hint of the pre-shading left. This can be an
effective way to create depth but on large upper surfaces can lead to the colour
looking flat.
The post-shading method improves on these techniques allowing the modeller
greater control and flexibility.
Once the model is all masked up (for me that includes the canopies), the
first stage of this technique is a good primer. I use Halfords auto primer in
both grey and white direct from the can. This stuff is very easy to use, dries
quickly and goes on remarkably thinly. I use the white if there is any yellow or
red areas as these colours tend to be very transparent or the camouflage is a
similar shade to the grey. I have also used Tamiya acrylic, which has a nice
flat finish.
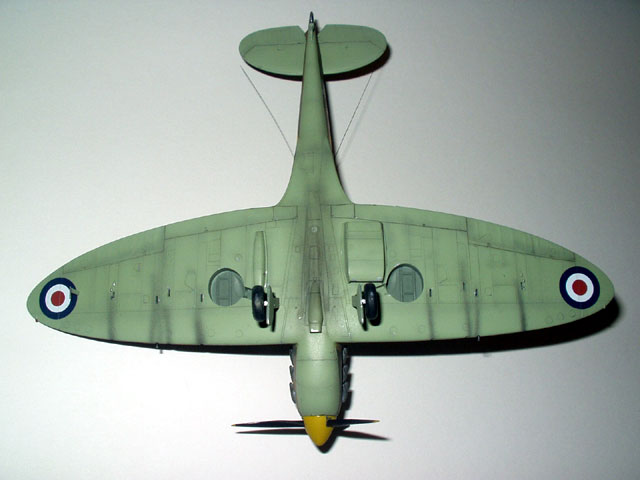
The next stage is to apply a coat of the base colour, which is lightened. The
degree to which this is done depends on three main factors. Firstly the theatre
of operations where the aircraft operated, for example aircraft in the Pacific
or Western Desert theatres would suffer a marked bleaching effect compared with
aircraft on the Western European front. Secondly the age of an aircraft,
obviously the older the aircraft the longer it has been exposed to the elements,
the extreme for example would be a shot down/abandoned aircraft on a desert
airfield. Lastly the quality of paint could effect the level of fading; Japanese
aircraft suffered from poor quality paint throughout the war.
When the lightened colour has been applied, apply a thin coat of base colour
along panel lines and areas where the fading of paint is less apparent such as
on the sides of fuselages, wing roots etc. The width of the spray and the amount
of coats applied depend on how subtle you want the effect to be.
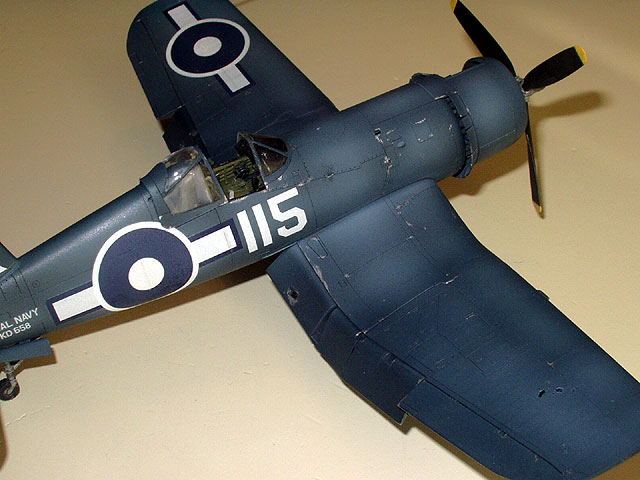
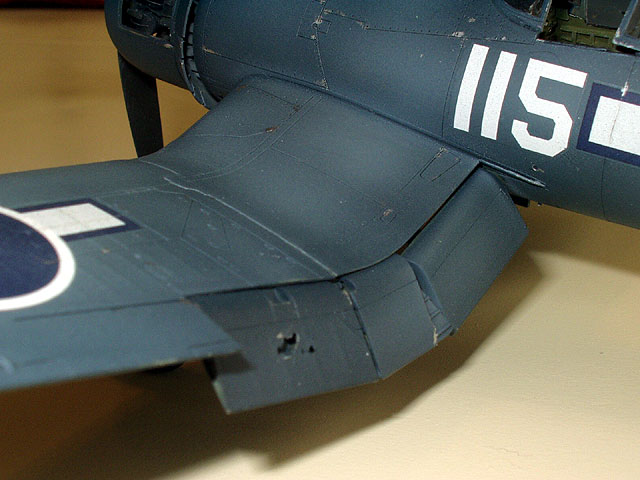
The final stage with the airbrush is to mix a darker base colour. This is the
sprayed along the panel lines with a very fine nozzle. The effect is built up
with ever-darker tones until you arrive at the level of contrast you are happy
with. If the dark tones are built up slowly, then any inaccuracies are less
noticeable and easier to fix.
The very last stage is to pick out panel lines with a wash. I use base colour
darkened and flowed into panel lines using a very fine brush. You may need to
apply a clear varnish coat if using oil based paints but I solely use acrylics
so this is not necessary.
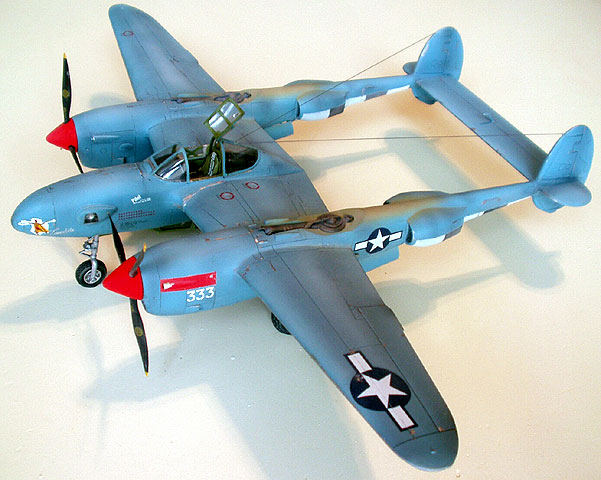
Post-shading can be used with 2 or more camouflage colours free hand but I
prefer to do one colour at a time using blue-tac rolled into thin lines for the
demarcation as it makes life a lot easier and produces a very fine feathered
edge.
The beauty of this technique is that the level of weathering is more easily
controlled than using the pre-shading method. A quick thin layer of base colour
can tone down things if you’ve gone too far or conversely a lightened tone can
be used to the opposite effect. Be advised however that any clear varnish will
darken the overall hue, the more coats the worse it gets or in some cases this
could be an advantage.
Why don’t you give this technique a try? It might sound a bit long winded but
using acrylics with small drying times it’s not really and the results are worth
it.
Images and Captions Copyright © 2003 by
Jamie Haggo
Page Created 18 April, 2003
Last Updated 18 April, 2003
Back to HyperScale Main Page
Back to Reference Library
|
 Home |
What's New |
Features |
Gallery |
Reviews |
Reference |
Forum |
Search
Home |
What's New |
Features |
Gallery |
Reviews |
Reference |
Forum |
Search