|
Using Parafilm-M
by David
W. Aungst

HyperScale is proudly supported by Squadron
Ever since my Masking Cockpits
posting, I have received quite a few questions regarding the use of
Parafilm-M for masking cockpit glass. The questions run the full gamut from
"What is Parafilm-M?" to "Can you help me figure out how to use Parafilm-M?".
Parafilm-M has been my weapon of choice for masking canopies for the last ten
or so years. I also will use it for masking over Metalizers. As there is no
adhesive to lift the Metalizer paint off the model, it works great for this.
There are some tricky tendencies to watch for, but overall it is good stuff.
And, it costs considerably less than the five or more dollars that the pre-cut
canopy masks cost. That leaves me with more money to buy after-market goodies
that will still be on the model when I am done.
Armed with my years of Parafilm-M experience and a digital camera, I decided
to see if I could put together a meaningful posting on the use of Parafilm-M.
For continuity, I wanted to use the same model for this entire posting. So, I
had to wait to put this posting together until I had a project up to the point
of getting its canopy masked. The first project to get that honor was not the
normal, run of the mill model, though.
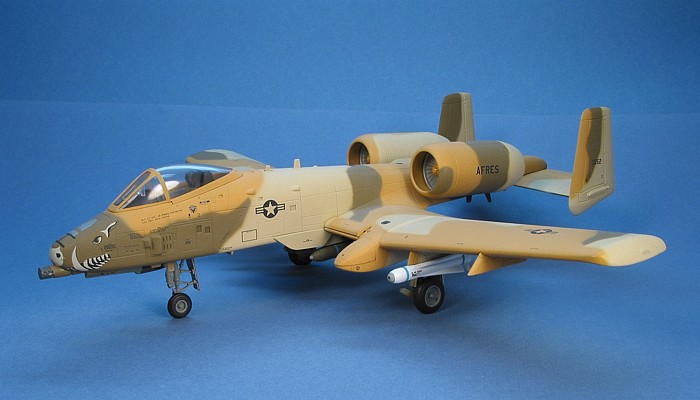
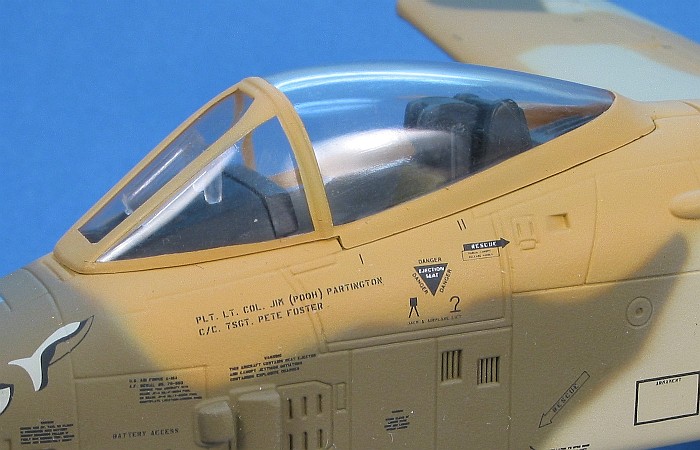
Instead, it is a 1/48th scale die cast metal A-10A Warthog model. I am
painting up several of these metal models as prototypes for a collector's toy
company. After I finish them, the models are shipped to a production facility in
Asia where they will be copied and mass produced. If you see a die cast metal
A-10A in this brown camouflage, know that I did the research and work on the
prototype model that the die cast model is based on.
In building this model, the toy company provided the die cast kit to me. I
was not permitted to modify any of the pieces or even address the seams. All I
could do is construct the kit, paint it, and decal it. As painting and decaling
are probably my two most favorite tasks in modeling, I had fun. And, best of
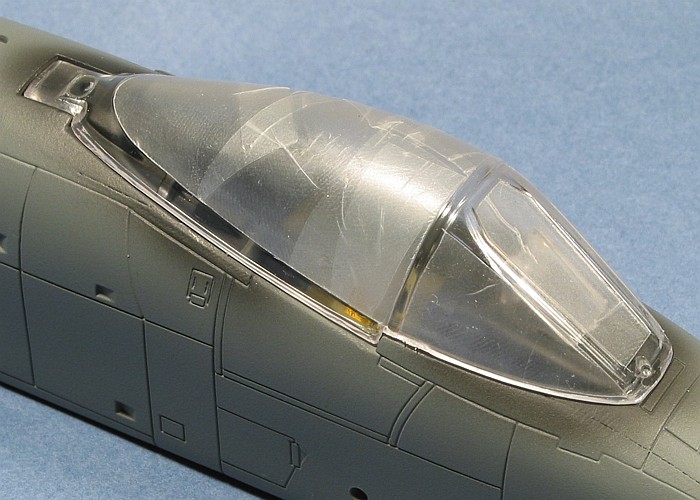
all, I got paid for the work. Below is a picture of the completed model.
If you wish to see more of this model, I sent some pictures to Two Bobs
Decals for them to place in their model gallery (since it was their decals I
used on the model). You can check them out there.
Now, back to talking about Parafilm-M.
 What
is Parafilm-M? What
is Parafilm-M?
Parafilm-M is a waxy plastic film that was created for laboratory use. Its
primary use before the modeling industry found it was for sealing test tubes in
the laboratory. It creates an easy, air-tight seal on test tubes without using
any adhesives that could taint the contents of the test tube. Lacking adhesives
means that it is easy to remove the stuff without leaving any sticky residue.
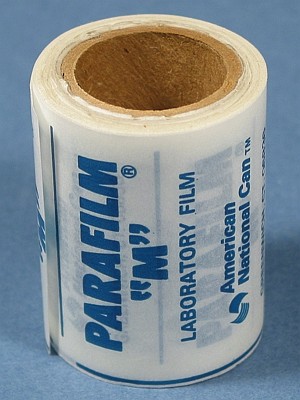
Parafilm-M comes in rolls, 2 inches wide and several yards long. I typically
use the stuff in one inch segments, so this is quite a supply, even for a very
busy modeler.
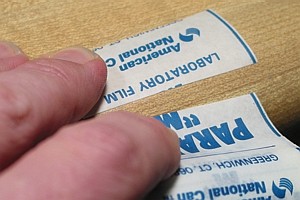
Where do you get it?
I cannot answer this directly as the roll I have dates back about ten years.
I bought mine in a hobby shop, packaged on a bubble pack from Testor. As
quickly as I have been using my one roll (I am about halfway though it), I will
not likely need another roll in the next ten or so years. I understand that some
marketing issues forced Testor to stop marketing the stuff, but I could be wrong
about this.
I have been told that Parafilm-M is available from most any laboratory supply
house. If you have friends in the medical business, they likely have access to
it and could get you some. A friend of mine has a mother that works in a
doctor's office. She was able to order a case of the stuff for him (I estimate
that to be a 400 year supply).
What follows are step-by-step instructions on how I use Parafilm-M. When I
bought it, the Testor packaging included instructions, but they would have you
wasting a whole lot of the stuff, so I have amended their instructions and will
related them here.
Some of my usage is based specifically on my work desk design. I custom built
my work desk starting with a five-foot section of kitchen counter top. This
counter top has a rounded front edge that allows me to cut and handle the
Parafilm-M pretty easily. The same instructions can work without the nice
rounded surface, but the technique will vary. I will leave this to you to figure
out.
-
The first step is to cut a small piece of
Parafilm-M off the roll. Testor instructions said to cut about a 4 inch
length. I find that 1 inch is more than enough. See the next steps for why.
Before moving on, though, take care to press the loose end of the Parafilm-M
roll back down. I have found that leaving it unrolled allows it to "dry out"
and it gets brittle, thus making it useless.
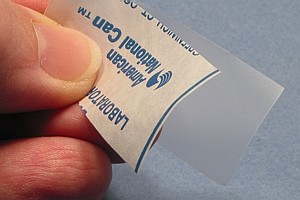
-
Remove the protective paper
covering.
-
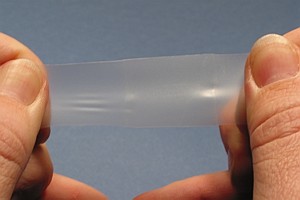
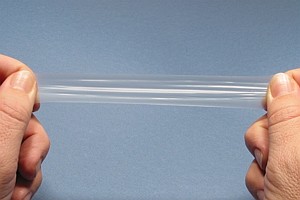
Grip the Parafilm-M firmly at each end and
stretch it in the long direction. A 1 by 2 inch unstretched piece of
Parafilm-M will provide a ¾ by 10 inch piece of ready-to-use Parafilm-M (a
little over 7 square inches). This is why Testor "4 inch" instructions are
excessive. Following their instruction will yield a 1½ by 40 inch piece of
ready-to-use Parafilm-M (about 60 square inches). Besides not having enough
room to work with such a length, I have found most 1/48th scale canopies do
not require more than about four to five square inches of Parafilm-M to cover
them (allowing for some excesses to be cut away). The other 55 or so square
inches in the Testor instructions would get wasted unless you are building
lots of models all at the same time.
Doing this stretching takes a little practise. After a time or two, you get
the hang of it. I will hold the Parafilm-M up as I stretch it so I can see
light through it. As it stretches, the consistency of the Parafilm-M changes.
I continue to stretch until the Parafilm-M is all one uniform consistency (as
seen by the light shining through it).
It is this stretching process that activates adhesive qualities in the waxy
surface of the Parafilm-M. Stretched Parafilm-M will cling with an almost
static-like adhesion to most any smooth, dry surface. The warmth of your
fingers when you press the Parafilm-M into place enhances the adhesion.
 |
 |
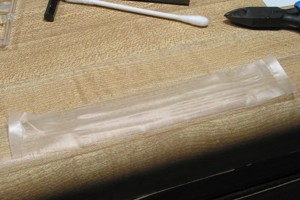
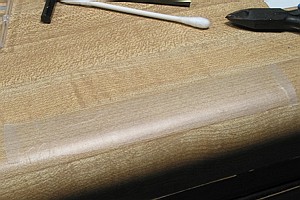
-
After stretching the Parafilm-M, I lay it down
and give it a moment to relax (about ten seconds). Then, I press it down onto
my rounded work desk edge and cut away the unstretched end portions where I
was holding the piece. Any sufficiently sized smooth surface would do for
this. A large piece of clean, smooth sheet styrene would be good. Even a piece
of plate glass (which some modelers use to cut decals) would be fine.
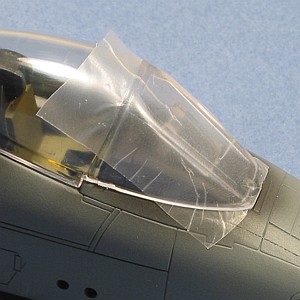
-
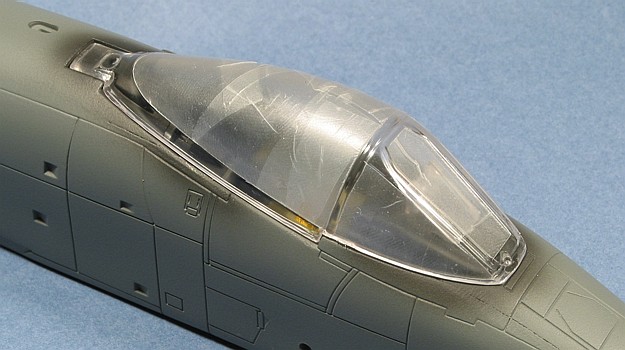
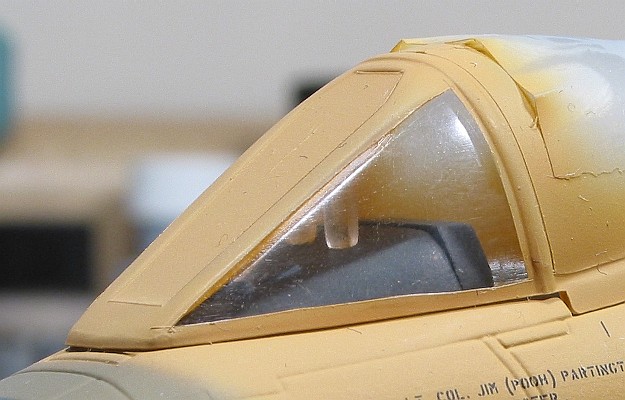
Cut off small pieces of Parafilm-M to apply to
the canopy. The size and shape of these pieces is driven by the size and shape
of the canopy I am covering.
The stretchy quality of Parafilm-M is the biggest asset to using it. I have
found no outside corner or shape that it will not cover. Even if it folds over
on itself a little, the seal on the canopy remains tight -- just press it
down. You can further stretch it as you apply it to the canopy. Be warned,
though, that as you stretch it more, it gets extremely thin. The point where
it rips is easily reached if you are not careful. It is also possible for it
to stretch to the point of becoming porous and thus not masking the canopy
very well any more. My advise is to not stretch it too much after the initial
stretch.
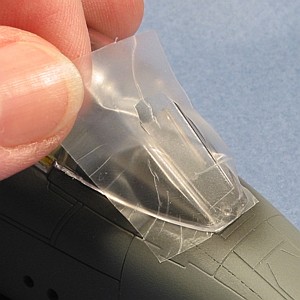
-
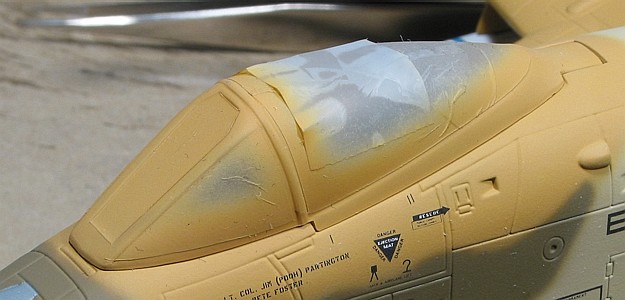
Cut away the excess Parafilm-M from the edges of
the canopy.
Important! -- Parafilm resists being cut unless two things
are both true:
-
The knife you use must be extremely sharp,
such as a brand new X-acto blade.
-
The Parafilm must be fully against the
canopy surface.
If either of these conditions is not true, the
Parafilm-M will not cut cleanly. It will drag and deform as it is cut. The
sharp blade is pretty easy to get right, just replace the blade in your knife
before you start cutting. The part about keeping the Parafilm-M fully against
the surface is not always so easy. Inside corners can be almost impossible to
get the Parafilm-M to go into. The Parafilm-M adheres to most any tool I have
tried for pushing the stuff into inside corners. When I pull the tool away,
the Parafilm-M lifts away with the tool instead of remaining in the corner
that I just pressed it into.
I will resort to Scotch brand Magic Transparent
tape for doing tight inside corners as Parafilm-M does not do these well. I
have had no trouble combining the use of tape and Parafilm-M on the same
model. Apply the tape first, than fill and finish the masking with Parafilm-M.
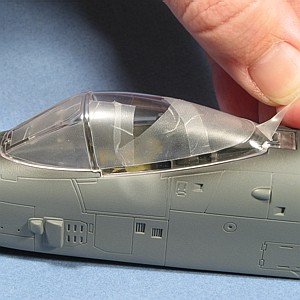
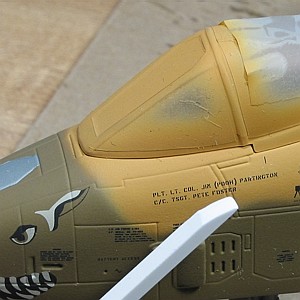
-
With all the canopy portions masked and the
Parafilm-M trimmed, I will paint, apply decals, and weather the model. You are
on your own with these processes.
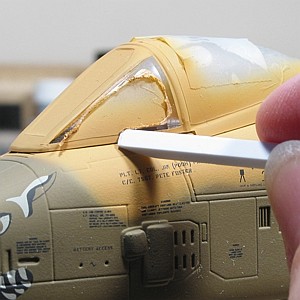
-
Remove the Parafilm-M.
The length of time on the model and the types of paints you use will effect
how easily Parafilm-M will come off the canopies. I use some pretty potent
paints (enamels and lacquers thinned with Xylene) and I tend to leave the
Parafilm-M on the model for upwards of a month (on average) as I do not unmask
the canopies until after I complete weathering. This combination leaves the
Parafilm-M pretty tight on the canopy. This is good as no paint gets under the
Parafilm-M. It took me some time, though, to figure out how to easily remove
it.
What I use that seems the easiest with the least damage to anything is a short
strip of Evergreen styrene (0.100 by 0.080 inch cross-section and about 4
inches long). I file one end to a chisel point and use this to scrape off the
Parafilm-M. As the Evergreen styrene is softer than the canopy, no scratching
occurs. And the paints I use are tough enough to not get damaged by the
scraping, either. I believe that if you use less potent paints, like water
based acrylics, the Parafilm-M comes off much easier. But, I have never tried
testing this.
When I mask Metalizers, I usually only have the stuff on for less than one
day. Even using the lacquer-based Metalizers, the Parafilm-M comes off easily
after just lifting one corner with the tip of a knife.
So there you have it. A step-by-step approach to using Parafilm-M.
I have not included many pictures of completed models in this posting as you
can find those elsewhere on this site. Almost every model I have on this site
has had its canopy (and any natural metal) masked by using Parafilm-M.
Text & Images Copyright ©
2002 by David W. Aungst
Page Created 29 April, 2002
Last Updated
19 April, 2004
Back to Reference Library
|
 Home |
What's New |
Features |
Gallery |
Reviews |
Reference |
Forum |
Search
Home |
What's New |
Features |
Gallery |
Reviews |
Reference |
Forum |
Search